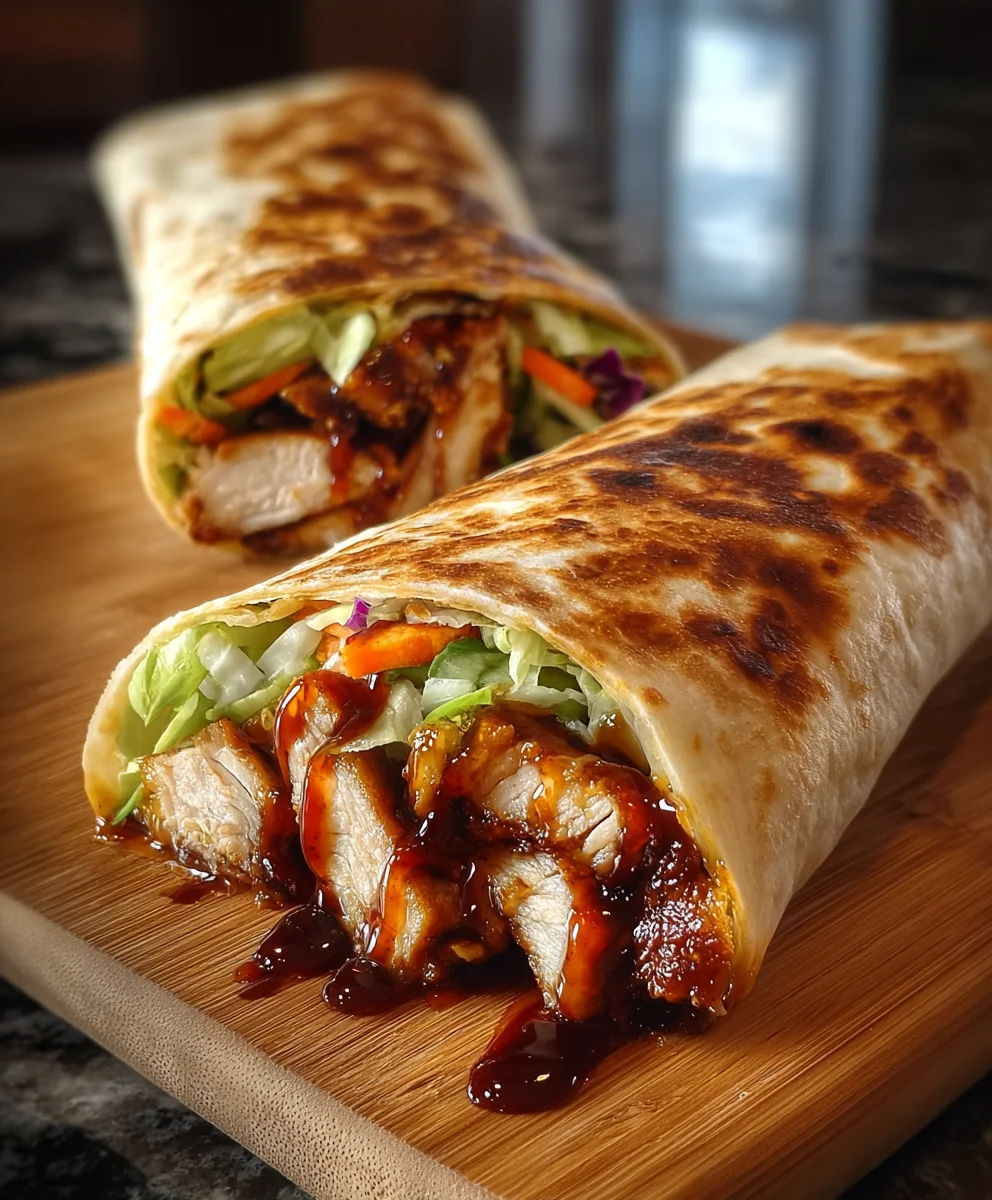
Teriyaki Chicken Wrap Recipe A Quick Flavor Adventure is precisely what awaits you today! I am absolutely thrilled to share a dish that consistently brings a burst of joy and flavor to my kitchen and, I’m sure, will to yours as well. Imagine tender, succulent chicken bathed in a glossy, savory-sweet teriyaki glaze, nestled amongst crisp, fresh vegetables, all perfectly enfolded within a soft tortilla. It’s a symphony of textures and tastes, designed for those moments when you crave something incredibly satisfying but have limited time.
While the humble wrap has a diverse history across many cultures as a convenient way to enjoy meals, the star of this particular show, teriyaki, hails from Japan. Its name combines ‘teri’ (gloss, referring to the shine given by the sauce) and ‘yaki’ (grill or broil). This iconic sauce has transcended borders, becoming a global favorite for its incredible umami depth and versatility. We’re taking that beloved flavor profile and transforming it into a remarkably accessible and utterly delightful meal solution, perfect for modern life.
People absolutely adore this dish not just for its undeniable deliciousness – the perfect balance of sweet, savory, and tangy notes – but also for its sheer convenience. It’s ideal for a speedy weeknight dinner, a wholesome packed lunch, or even a casual gathering. The tender chicken, the crunchy vegetables, and the soft wrap create a wonderfully engaging eating experience that makes every bite an absolute pleasure. This Teriyaki Chicken Wrap Recipe A Quick Flavor Adventure truly delivers on its promise of a memorable, fuss-free meal you’ll want to make again and again.

Ingredients:
- For the Teriyaki Chicken:
- 1.5 lbs boneless, skinless chicken breasts or thighs, cut into 1-inch pieces
- 2 tablespoons soy sauce (low sodium preferred)
- 1 tablespoon rice vinegar
- 1 teaspoon sesame oil
- 1/2 teaspoon black pepper
- 1 tablespoon vegetable oil (for cooking)
- For the Homemade Teriyaki Sauce:
- 1/2 cup soy sauce (low sodium preferred)
- 1/4 cup mirin (sweet rice wine)
- 2 tablespoons sake (optional, or substitute with chicken broth)
- 1/4 cup brown sugar, packed (light or dark, adjust to sweetness preference)
- 1 tablespoon grated fresh ginger (about a 1-inch piece)
- 2 cloves garlic, minced
- 1 tablespoon cornstarch
- 2 tablespoons cold water
- For the Wraps and Fillings:
- 6-8 large flour tortillas (10-12 inches), whole wheat or spinach tortillas work great
- 2 cups shredded green or red cabbage, or a mix
- 1 cup shredded carrots (about 2 medium carrots)
- 1/2 cup thinly sliced cucumber (English cucumber works well)
- 1/4 cup chopped fresh cilantro
- 2 tablespoons toasted sesame seeds (for garnish, optional but highly recommended)
- Optional: 1/4 cup thinly sliced green onions (scallions) for garnish
- Optional: A few dashes of Sriracha or your favorite chili garlic sauce for a spicy kick
- Optional: A drizzle of Japanese mayonnaise or a creamy dressing
Preparing the Homemade Teriyaki Sauce and Marinating the Chicken
This is where our flavor adventure truly begins! Taking a few extra moments to make your own teriyaki sauce makes an incredible difference, offering a depth of flavor far superior to store-bought versions. Plus, a good marinade ensures every bite of chicken is bursting with that signature sweet and savory goodness.
- Whisk Together the Sauce Base: In a medium saucepan, combine the 1/2 cup soy sauce, mirin, sake (if using, otherwise substitute with chicken broth), brown sugar, grated fresh ginger, and minced garlic. Whisk these ingredients together until the brown sugar has dissolved. This forms the aromatic foundation of our beautiful teriyaki sauce.
- Prepare the Cornstarch Slurry: In a small separate bowl, whisk together the 1 tablespoon of cornstarch with the 2 tablespoons of cold water until a smooth slurry forms. This is our secret weapon for achieving that luscious, glossy thickness we love in teriyaki sauce. Make sure there are no lumps, as this will ensure a smooth sauce.
- Simmer and Thicken the Teriyaki Sauce: Place the saucepan with the sauce base over medium heat. Bring the mixture to a gentle simmer, stirring occasionally. Once it’s simmering, slowly pour in the cornstarch slurry while continuously whisking. Continue to whisk for 1-2 minutes until the sauce thickens to a consistency that coats the back of a spoon. It should be thick enough to cling to the chicken but still pourable. Remove the sauce from the heat and set aside. You will be using about 1/3 of this sauce for marinating the chicken and the remaining for glazing later.
- Prepare the Chicken for Marinating: If you haven’t already, cut your chicken breasts or thighs into uniform 1-inch pieces. Uniform pieces ensure even cooking, which is key to tender, juicy chicken. Place the chicken pieces in a medium bowl or a sealable plastic bag.
- Marinate the Chicken: Pour about 1/3 of the freshly prepared teriyaki sauce over the chicken pieces. Add the 2 tablespoons of soy sauce, 1 tablespoon of rice vinegar, 1 teaspoon of sesame oil, and 1/2 teaspoon of black pepper to the chicken. Toss everything together until the chicken is thoroughly coated in the marinade. Ensure every piece gets a good coating; this is where the chicken really starts to soak up all those incredible flavors.
- Chill and Rest: Cover the bowl or seal the bag and refrigerate the chicken for at least 30 minutes. For optimal flavor penetration and tenderness, I highly recommend letting it marinate for 1-2 hours. If you’re really pressed for time, even 15 minutes will add some flavor, but the longer it marinates, the more depth of flavor your chicken will have. Don’t let it marinate for more than 4 hours, as the acids can start to break down the chicken too much.
Cooking the Teriyaki Chicken
Now that our chicken is beautifully marinated and our sauce is ready, it’s time to bring that fantastic teriyaki flavor to life in a hot pan. The goal here is perfectly cooked, tender chicken with a gorgeous caramelized glaze. This step is quick, so have everything prepped and ready to go!
- Heat the Pan: Heat 1 tablespoon of vegetable oil in a large non-stick skillet or a cast-iron pan over medium-high heat. You want the pan to be hot enough to sear the chicken and create a nice crust, but not so hot that it burns the marinade. A good test is to flick a tiny bit of water into the pan; if it sizzles and evaporates quickly, you’re ready.
- Cook the Chicken: Once the oil is shimmering, add the marinated chicken pieces to the hot pan in a single layer. Try not to overcrowd the pan; if necessary, cook the chicken in two batches. Overcrowding can lower the pan’s temperature, causing the chicken to steam instead of sear, which prevents that lovely browning we’re after.
- Sear and Flip: Cook the chicken for 3-4 minutes per side, or until it’s beautifully browned and cooked through. You’ll see a lovely caramelization forming on the chicken from the sugars in the marinade. Use tongs to turn each piece, ensuring even cooking. The internal temperature of the chicken should reach 165°F (74°C).
- Add Remaining Sauce for Glaze: Once the chicken is cooked through and has a nice color, pour the remaining teriyaki sauce (the portion you set aside earlier) over the chicken in the pan. Bring the sauce to a simmer and cook for another 1-2 minutes, stirring gently, until the sauce thickens and coats the chicken in a luscious, sticky glaze. This final glaze is what truly elevates the chicken and makes it shine.
- Remove from Heat: Take the pan off the heat. If you like, you can let the chicken rest in the pan for a few minutes to reabsorb some juices, ensuring maximum tenderness. I usually transfer it to a serving bowl or plate, ready for assembly.
Preparing the Wrap Components and Assembly
With our star ingredient, the teriyaki chicken, perfectly cooked and glistening with sauce, it’s time to gather the supporting cast of fresh, crisp vegetables and assemble our delightful wraps. This is the fun part, where all the individual components come together to create a harmonious and incredibly satisfying meal.
- Prepare the Fresh Fillings: While the chicken is cooking or resting, take a moment to prepare your fresh vegetables.
- Shred the cabbage thinly – a mandoline or the shredding attachment of a food processor makes this super quick, but a sharp knife works just as well.
- Shred the carrots – again, a grater or food processor speeds this up.
- Slice the cucumber very thinly.
- Chop the fresh cilantro.
- If using, thinly slice the green onions.
- Arrange these prepared vegetables neatly on a platter or in individual bowls. This makes the assembly process smooth and enjoyable, feeling like your own little wrap bar!
- Warm the Tortillas (Optional but Recommended): Gently warm your large flour tortillas. This makes them more pliable, easier to roll without tearing, and enhances their flavor. You can do this in a few ways:
- Microwave: Stack them (6-8 at a time) and microwave for 20-30 seconds until warm and soft.
- Dry Skillet: Heat a dry skillet over medium heat and warm each tortilla for about 15-20 seconds per side until soft and lightly browned in spots.
- Oven: Wrap them in foil and heat in a preheated oven at 300°F (150°C) for about 5-10 minutes.
- Assemble Your Teriyaki Chicken Wraps: This is where the magic happens! Lay one warm tortilla flat on a clean work surface.
- Layer the Ingredients:
- First, if desired, spread a very thin layer of Japanese mayonnaise or a creamy dressing down the center of the tortilla. This adds an extra layer of richness and moisture.
- Next, spoon a generous portion of the glazed teriyaki chicken onto the lower-middle section of the tortilla, leaving enough space around the edges for folding.
- Top the chicken with a handful of shredded cabbage and carrots. Don’t be shy with the veggies; they add a crucial crunch and freshness that balances the rich chicken.
- Add a few slices of cucumber and a sprinkle of fresh cilantro and green onions (if using).
- If you enjoy a bit of heat, drizzle a few dashes of Sriracha over the fillings.
- Fold the Wrap:
- Fold the bottom edge of the tortilla up and over the filling, tucking it in tightly.
- Then, fold in the sides of the tortilla over the filling, creating a neat package.
- Finally, roll the wrap up from the bottom, away from you, as tightly as possible without tearing the tortilla, until you have a compact, portable wrap.
- Garnish and Serve: Once all your wraps are assembled, you can slice them in half diagonally for an attractive presentation and easier eating. Sprinkle the cut ends with toasted sesame seeds and any remaining fresh cilantro or green onions for a beautiful finish. Serve immediately and enjoy your incredibly flavorful Teriyaki Chicken Wraps!
Tips, Variations, and Enhancements for Your Flavor Adventure
This “Teriyaki Chicken Wrap Recipe A Quick Flavor Adventure” is incredibly versatile! Here are some ideas to customize it to your taste, dietary needs, or simply to keep things exciting:
Customizing Your Chicken:
- Chicken Thighs: While I love chicken breast for its lean profile, chicken thighs are incredibly forgiving and add a richer flavor. They might need a couple of extra minutes of cooking time due to their slightly higher fat content.
- Different Cooking Methods: Instead of pan-frying, you can grill the marinated chicken pieces on skewers or bake them at 375°F (190°C) for 15-20 minutes until cooked through, then toss with the remaining glaze. Grilling adds a lovely smoky char!
- Shredded Chicken: If you prefer a different texture, you can cook larger pieces of chicken (breasts or thighs), then shred them using two forks before tossing with the teriyaki glaze. This creates a softer, pulled-chicken-style filling.
Exploring Vegetable Combinations:
- Bell Peppers: Thinly sliced red, yellow, or orange bell peppers add sweetness and a vibrant crunch.
- Edamame: Shelled edamame (steamed and cooled) offers a great source of protein and a delightful texture.
- Red Cabbage: Don’t underestimate red cabbage for its beautiful color and peppery bite!
- Spinach or Mixed Greens: For a softer green, a handful of fresh baby spinach or mixed greens can be added.
- Avocado: Sliced or mashed avocado adds a creamy, healthy fat component that pairs wonderfully with the teriyaki flavor.
- Pineapple: A few small cubes of fresh or canned pineapple (drained) can introduce a delightful tropical sweetness and acidity, echoing Hawaiian-style teriyaki.
Sauce and Spice Level Adjustments:
- Spicy Kick: If you love heat, whisk in 1/2 teaspoon to 1 teaspoon of Sriracha or chili garlic sauce into your teriyaki sauce while it simmers. You can also add a pinch of red pepper flakes to the marinade.
- Sesame Boost: A dash of toasted sesame oil added to the finished teriyaki sauce (after thickening) provides an extra layer of nutty aroma.
- Citrus Brightness: A squeeze of fresh lime or orange juice right before serving can brighten up all the flavors.
Wrap Alternatives:
- Lettuce Wraps: For a lighter, lower-carb option, use large, crisp lettuce leaves (like butter lettuce, romaine hearts, or iceberg lettuce cups) instead of tortillas.
- Rice Bowls: Turn this into a delicious teriyaki chicken bowl by serving the chicken and veggies over a bed of steamed jasmine rice or brown rice. Drizzle extra teriyaki sauce over the top!
- Gluten-Free: Ensure your soy sauce is gluten-free (tamari) and use gluten-free tortillas for a completely GF meal.
Meal Prep and Storage:
- Make Ahead Components: The teriyaki sauce can be made up to 3-4 days in advance and stored in an airtight container in the refrigerator. The chicken can be marinated the night before. All vegetables can be prepped and stored separately in airtight containers for 2-3 days.
- Cooked Chicken Storage: Cooked teriyaki chicken can be stored in the refrigerator for up to 3-4 days. Reheat gently in a skillet or microwave.
- Assembly: For best results and to prevent sogginess, I always recommend assembling the wraps just before eating. This keeps the tortillas fresh and the vegetables crisp.
Why This Is a “Quick Flavor Adventure”:
This recipe truly lives up to its name because it’s a journey for your taste buds that’s surprisingly quick to prepare. The harmonious blend of sweet, savory, umami-rich teriyaki with the vibrant crunch of fresh vegetables creates a dynamic contrast in every bite. It’s a complete meal that feels exciting and exotic, yet it comes together with simple ingredients and straightforward steps. The customizable nature means you can embark on a new flavor adventure every time you make it, experimenting with different veggies or a touch more spice. It’s perfect for a weeknight dinner when you crave something beyond the ordinary but don’t have hours to spend in the kitchen. Enjoy the delicious ride!
Conclusion:
And there you have it, my friends! We’ve reached the end of our culinary journey for today, but truly, the adventure is just beginning for you in your own kitchen. I genuinely believe that this particular recipe isn’t just another dish to add to your rotation; it’s a game-changer for busy weeknights, a brilliant solution for a quick yet incredibly satisfying lunch, and a definite crowd-pleaser for casual gatherings. What makes it a must-try, you ask? Well, it’s the perfect marriage of tender, succulent chicken, lovingly coated in that irresistible, sticky-sweet, and savory teriyaki glaze that we’ve perfected together. Combine that with the refreshing crunch of crisp vegetables, all nestled snugly within a soft tortilla, and you have a symphony of textures and flavors that dances on your palate. It’s light yet filling, incredibly flavorful without being heavy, and surprisingly simple to whip up, even after a long day.
I often find myself reaching for this recipe when I need something delicious on the table fast, something that feels both wholesome and indulgent at the same time. The balance of salty, sweet, umami, and fresh is simply unparalleled, ensuring every bite is as exciting as the last. It transforms what could be a mundane meal into something truly special, a testament to how simple ingredients, when treated with a little care and a fantastic sauce, can create culinary magic. This isn’t just a meal; it’s truly a Teriyaki Chicken Wrap Recipe A Quick Flavor Adventure that promises delight without the fuss. It’s fantastic for those moments when you’re craving takeout flavors but want the comfort and control of a homemade dish, knowing exactly what’s going into your body. Plus, the vibrant colors alone make it an appealing dish, inviting you to dig in even before the first scent hits you.
Creative Serving Suggestions and Delicious Variations:
Now, let’s talk about how you can make this wonderful wrap even more your own. While it’s absolutely perfect as is, I love to encourage experimentation! For a complete meal, consider serving your wraps alongside a light and refreshing side. A simple Asian-inspired cucumber salad, thinly sliced and dressed with a little rice vinegar, sesame oil, and a pinch of chili flakes, would be an exquisite companion. Alternatively, a small bowl of miso soup or some steamed edamame can add another layer of authenticity and nutrition. Don’t be afraid to think outside the wrap as well! If you’re trying to cut down on carbs, or simply prefer a deconstructed meal, turn this into an incredible Teriyaki Chicken Bowl. Simply serve the chicken and vegetables over a bed of fluffy white rice, brown rice, or even quinoa. A sprinkle of sesame seeds and a drizzle of extra teriyaki sauce over the top will elevate it beautifully.
Endless Possibilities for Customization:
The beauty of this recipe truly lies in its versatility. You can easily swap out the protein if chicken isn’t quite what you’re in the mood for. Thinly sliced beef, succulent shrimp, or even firm tofu or tempeh can be prepared in exactly the same way, absorbing all that glorious teriyaki flavor. For extra crunch and a nutritional boost, feel free to load up on additional vegetables. Shredded red cabbage, finely diced bell peppers (red, yellow, or orange for a pop of color), water chestnuts for a unique texture, or even some blanched broccoli florets can be wonderful additions. If you like a little heat, a dash of sriracha or a few red pepper flakes in the sauce or sprinkled directly into your wrap will provide a delightful kick. For those who enjoy a brighter, zestier note, a squeeze of fresh lime juice over the finished chicken or within the wrap before rolling can truly awaken the flavors. And don’t limit yourself to just plain flour tortillas! Whole wheat tortillas offer a nuttier flavor and extra fiber, while spinach or sun-dried tomato wraps can add an interesting visual appeal and subtle flavor difference. You can even make mini versions for appetizers or kid-friendly snacks by using smaller tortillas!
Your Turn to Shine in the Kitchen!
I’ve shared all my tips and tricks, and now it’s your moment to take the reins. I truly, truly hope that you’re feeling inspired to give this Teriyaki Chicken Wrap Recipe A Quick Flavor Adventure a try this week. It’s more than just cooking; it’s about creating delicious, memorable moments in your kitchen. I can almost taste the satisfaction you’ll feel when you bite into your perfectly homemade, flavor-packed wrap. Once you’ve made it, I would absolutely love to hear about your experience! Did you stick to the recipe, or did you put your own unique spin on it? What were your favorite parts? Please, please come back and share your thoughts in the comments section below. I adore hearing about your culinary successes and any variations you discover. And if you snap any photos of your amazing creations, I’d be thrilled to see them! Happy cooking, my friends, and enjoy every single delightful bite!
Quick Teriyaki Chicken Wraps
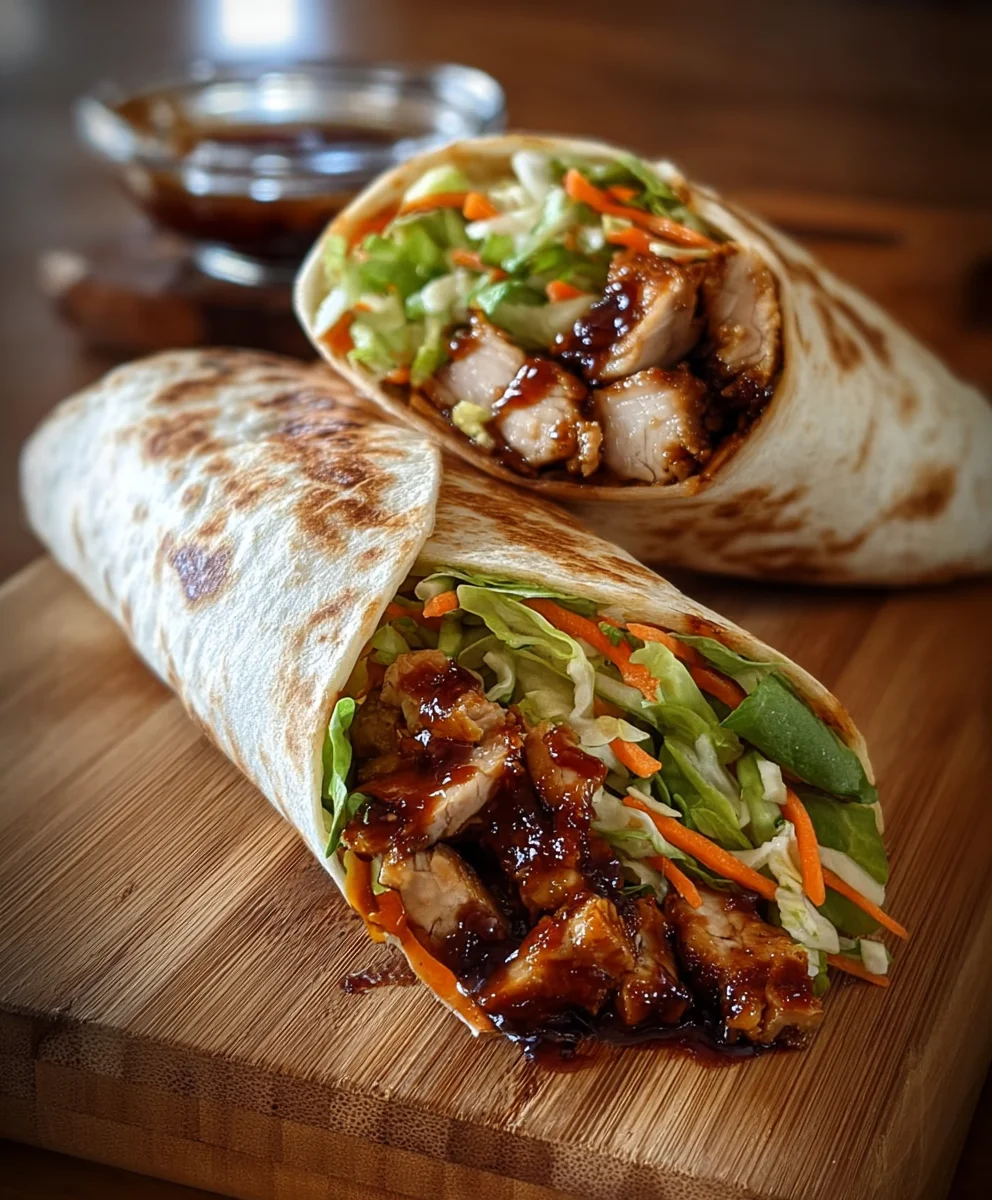
Tender chicken in a savory-sweet teriyaki glaze, nestled with crisp fresh vegetables in a soft tortilla. This dish is a quick and satisfying meal, perfect for a speedy weeknight dinner or a wholesome packed lunch, offering a delightful balance of sweet, savory, and tangy notes.
Ingredients
-
1.5 lbs boneless, skinless chicken breasts or thighs, cut into 1-inch pieces
-
2 tbsp soy sauce (low sodium)
-
1 tbsp rice vinegar
-
1 tsp sesame oil
-
1/2 tsp black pepper
-
1 tbsp vegetable oil (for cooking)
-
1/2 cup soy sauce (low sodium)
-
1/4 cup rice vinegar (for mirin substitute)
-
2 tsp sugar (for mirin substitute)
-
2 tbsp chicken broth (for sake substitute)
-
1/4 cup packed brown sugar
-
1 tbsp grated fresh ginger
-
2 cloves minced garlic
-
1 tbsp cornstarch
-
2 tbsp cold water
-
6-8 large flour tortillas (10-12 inches)
-
2 cups shredded cabbage (green or red)
-
1 cup shredded carrots
-
1/2 cup thinly sliced cucumber
-
1/4 cup chopped fresh cilantro
-
2 tbsp toasted sesame seeds (optional)
-
Optional: 1/4 cup thinly sliced green onions
-
Optional: Sriracha or chili garlic sauce
-
Optional: Japanese mayonnaise or creamy dressing
Instructions
-
Step 1
In a saucepan, combine 1/2 cup low sodium soy sauce, 1/4 cup rice vinegar, 2 tsp sugar, 2 tbsp chicken broth, 1/4 cup brown sugar, 1 tbsp grated ginger, and 2 minced garlic cloves. Bring to a gentle simmer. In a small bowl, whisk 1 tbsp cornstarch with 2 tbsp cold water until smooth. Slowly pour the slurry into the simmering sauce, whisking for 1-2 minutes until thickened and glossy. Remove from heat. Set aside about 1/3 of this sauce for marinating. -
Step 2
Cut 1.5 lbs chicken into 1-inch pieces. In a bowl, combine chicken with the reserved 1/3 teriyaki sauce, 2 tbsp low sodium soy sauce, 1 tbsp rice vinegar, 1 tsp sesame oil, and 1/2 tsp black pepper. Toss to coat evenly. Refrigerate for at least 30 minutes, or up to 2 hours for best flavor. -
Step 3
Heat 1 tbsp vegetable oil in a large non-stick skillet over medium-high heat. Add marinated chicken pieces in a single layer (cook in batches if needed). Sear for 3-4 minutes per side until beautifully browned and cooked through (internal temperature 165°F/74°C). -
Step 4
Once chicken is cooked, pour the remaining teriyaki sauce (from the saucepan) over the chicken in the skillet. Bring to a simmer and cook for another 1-2 minutes, stirring gently, until the sauce thickens into a luscious, sticky glaze. Remove from heat. -
Step 5
While chicken cooks, prepare fresh fillings: thinly shred 2 cups cabbage and 1 cup carrots, slice 1/2 cup cucumber and 1/4 cup green onions (if using), and chop 1/4 cup fresh cilantro. Gently warm 6-8 large flour tortillas to make them pliable. -
Step 6
Lay one warm tortilla flat. Spread a thin layer of optional Japanese mayonnaise. Layer with glazed teriyaki chicken, shredded cabbage, carrots, sliced cucumber, cilantro, green onions, and optional Sriracha. Fold the bottom edge up, then fold in the sides, and roll tightly from the bottom. -
Step 7
Slice wraps diagonally in half. Garnish with toasted sesame seeds and any remaining fresh cilantro or green onions. Serve immediately.
Important Information
Nutrition Facts (Per Serving)
It is important to consider this information as approximate and not to use it as definitive health advice.
Allergy Information
Please check ingredients for potential allergens and consult a health professional if in doubt.