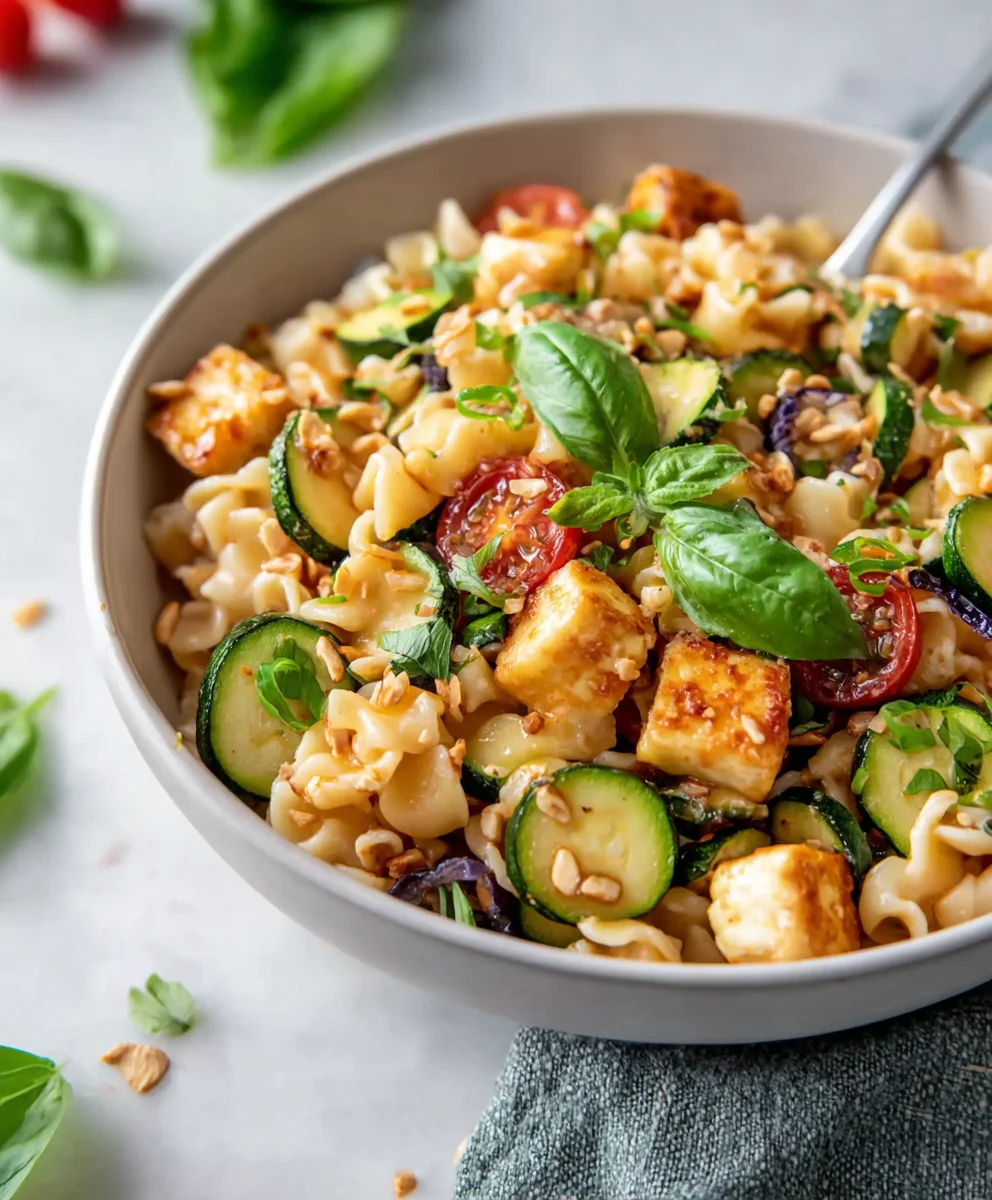
Colorful Halloumi Pasta Salad isn’t just a dish; it’s a celebration in a bowl, a vibrant masterpiece that promises to dazzle your taste buds and brighten any table. Imagine a culinary creation bursting with fresh, crisp vegetables, perfectly al dente pasta, and the star of the show – golden, pan-fried halloumi cheese. This salad isn’t merely food; it’s an experience, transforming simple ingredients into an extraordinary symphony of flavors and textures that you’ll want to recreate time and again.
Originating from the beautiful island of Cyprus, Halloumi cheese offers a truly unique experience with its high melting point, allowing it to be grilled or fried to a delightful golden crispness while retaining its signature squeaky texture. This ancient cheese brings a savory, salty dimension that perfectly complements the fresh components of a pasta salad. While pasta salads themselves have evolved into a beloved staple for gatherings worldwide, our take on the Colorful Halloumi Pasta Salad elevates it beyond the ordinary, offering both the comforting familiarity of pasta and the exciting novelty of this incredible cheese.
People absolutely adore this dish for countless reasons. It’s incredibly versatile, perfect for a light lunch, a satisfying dinner, or an impressive contribution to any potluck or picnic. The delightful contrast between the salty, pan-seared halloumi, the tender pasta, and the crunch of vibrant vegetables, all tossed in a zesty dressing, creates a remarkably satisfying and refreshing meal. Its make-ahead convenience and ability to taste even better the next day make it an absolute winner for busy schedules, ensuring you can enjoy a gourmet experience without the fuss.

Ingredients:
- Pasta: 500g (approximately 1.1 lbs) of your favorite short pasta shape. I personally adore using fusilli, farfalle (bow-tie pasta), or orecchiette for this recipe. Their unique shapes are absolutely perfect for catching and holding onto all the delicious dressing and small vegetable bits, ensuring every bite is packed with flavor.
- Halloumi Cheese: 2 blocks (250g / 8.8 oz each). Look for good quality halloumi; it’s the star here and provides that wonderful salty, squeaky texture when pan-fried to golden perfection.
- Cherry Tomatoes: 1 pint (about 300g / 10.5 oz). A mix of colors, if you can find them – red, yellow, and orange cherry tomatoes will truly make your salad pop and add a lovely spectrum of natural sweetness. Halving them releases their juices beautifully.
- English Cucumber: 1 large, or 2 smaller ones. I prefer English cucumbers because they have fewer seeds and thinner skin, meaning less prep work for you! They add a wonderfully refreshing crunch that balances the richness of the halloumi.
- Bell Peppers: 2 medium-sized. I always recommend using a vibrant combination, like one red and one yellow bell pepper, to maximize both visual appeal and a range of sweet, crisp flavors. Green can be a bit too bitter for this salad, in my opinion.
- Red Onion: 1 small. Finely diced, it provides a crucial punch of sharp, zesty flavor without overpowering the other ingredients. If you find raw red onion too strong, a quick rinse under cold water after dicing can mellow its intensity.
- Fresh Parsley: 1/2 cup, finely chopped. Flat-leaf (Italian) parsley is my go-to for its robust, fresh flavor that stands up well in a salad. It adds a vibrant green hue and an earthy undertone.
- Fresh Mint: 1/4 cup, finely chopped. Do not skip the mint! It’s the secret ingredient that elevates this pasta salad from great to absolutely extraordinary, adding a bright, cooling, and incredibly refreshing counterpoint to the savory halloumi.
- Extra Virgin Olive Oil: 1/2 cup for the dressing, plus an additional 2 tablespoons for pan-frying the halloumi. Using a high-quality extra virgin olive oil for the dressing makes a noticeable difference in flavor.
- Fresh Lemon Juice: From 2-3 juicy lemons (yielding about 1/4 cup). Freshly squeezed lemon juice is non-negotiable here. Bottled lemon juice simply doesn’t compare in terms of brightness and zestiness.
- Red Wine Vinegar: 2 tablespoons. This adds a crucial tang and depth to the dressing that complements the lemon beautifully.
- Dijon Mustard: 1 tablespoon. Not just for flavor, Dijon acts as a wonderful emulsifier, helping to bind the dressing ingredients together and give it a lovely creamy consistency without any actual cream.
- Honey or Maple Syrup: 1 teaspoon (optional, but highly recommended). Just a touch to balance the acidity of the lemon and vinegar, bringing all the dressing flavors into perfect harmony.
- Garlic: 2 cloves, minced. Fresh garlic provides an aromatic foundation for the dressing. If you’re a garlic lover like me, feel free to add an extra clove!
- Kosher Salt and Freshly Ground Black Pepper: To taste. You’ll need a generous amount of salt for the pasta water, and then both salt and pepper for seasoning the halloumi and the final salad to perfection. Taste as you go!
Preparing the Pasta and Halloumi
This phase is all about setting the foundation for our magnificent “Colorful Halloumi Pasta Salad.” We’re going to perfectly cook our pasta and give our halloumi that irresistible golden crispness.
- Cook the Pasta to Al Dente Perfection:
Grab a large pot and fill it with plenty of water – usually at least 4-5 quarts for 500g of pasta. This allows the pasta to swim freely and cook evenly. Add a generous amount of kosher salt to the water; I typically add about 1-2 tablespoons. The pasta water should taste like the sea! This is your primary opportunity to season the pasta itself, so don’t be shy. Bring the water to a rolling boil, then add your chosen pasta shape. Stir it immediately to prevent sticking. Cook according to the package directions, but aim for a minute or two less than the suggested time, so it’s perfectly al dente – meaning “to the tooth.” It should be firm but still have a slight bite in the center. Remember, for cold pasta salads, you really want that texture to hold up well.
Once cooked, drain the pasta thoroughly in a colander. Here’s a little trick for pasta salad: I typically do not rinse the pasta with cold water immediately after draining. Rinsing can wash away some of the starchy coating that helps the dressing adhere. Instead, I let it sit in the colander for a minute to allow some steam to escape, then transfer it to a large, wide bowl or baking sheet. Toss it gently with about a teaspoon of olive oil to prevent sticking as it cools, then spread it out. This method allows the pasta to cool down gradually, preventing it from clumping and retaining that lovely al dente texture. Let it cool completely to room temperature before moving on. This might take 20-30 minutes, depending on your environment.
- Prepare and Pan-Fry the Halloumi:
While your pasta is cooling, let’s turn our attention to the star of the show: the halloumi! First, carefully remove the halloumi blocks from their brine and pat them very dry with paper towels. This step is absolutely crucial for achieving that beautiful golden-brown crust. Any excess moisture will steam the cheese instead of searing it, and we want glorious crispiness! Slice each block into even, approximately 1/4-inch thick slices. Try to keep them uniform so they cook at the same rate.
Heat a large non-stick skillet or a cast-iron pan over medium-high heat. Add 2 tablespoons of extra virgin olive oil. Once the oil is shimmering and hot (you might see a wisp of smoke), carefully add the halloumi slices in a single layer. Do not overcrowd the pan! If your pan isn’t large enough, cook the halloumi in batches. Overcrowding will lower the pan’s temperature and lead to steaming rather than searing, which we want to avoid.
Cook for about 2-3 minutes per side, or until each slice is gorgeously golden brown and caramelized. You’ll see those lovely browned bits, which are packed with flavor. Once both sides are golden, transfer the cooked halloumi slices to a plate lined with paper towels to drain any excess oil. As they cool, the halloumi will firm up slightly, developing that signature squeaky texture we adore. Once cooled enough to handle, you can either leave them as slices or cut them into bite-sized cubes or strips, depending on your preference for the salad. I often cut them into 1/2-inch cubes for easier eating within the pasta salad.
Chopping and Prepping the Vibrant Vegetables
This is where our “Colorful Halloumi Pasta Salad” truly comes to life! The variety of fresh, crisp vegetables not only adds incredible flavor and texture but also makes this dish visually stunning. Take your time with these steps – precision in chopping makes a difference in every bite.
- Halve the Cherry Tomatoes:
Wash your pint of cherry tomatoes thoroughly. Then, simply slice each one in half. If you happen to have any particularly large cherry or grape tomatoes, you might want to quarter them. The goal here is to create bite-sized pieces that release their juicy sweetness when mixed into the salad. A mix of colored tomatoes here really makes the salad sing with visual appeal.
- Dice the English Cucumber:
Wash your large English cucumber. Since English cucumbers have thin skin and minimal seeds, I rarely bother peeling them – the skin adds a nice pop of green and extra nutrients. Trim off the ends, then cut the cucumber lengthwise into quarters. After that, slice across into approximately 1/2-inch pieces. You’re aiming for nice, even, bite-sized crescent or quarter-moon shapes that will provide a delightful, refreshing crunch in every forkful of salad.
- Prepare the Bell Peppers:
Wash your red and yellow bell peppers. Carefully slice them in half lengthwise and remove the stems, seeds, and any white pith inside. The pith can be a bit bitter, so make sure to get rid of it. Lay the pepper halves flat on your cutting board, skin-side down. Cut them into long, thin strips, and then turn the strips and dice them into approximately 1/2-inch pieces. This ensures you get a good mix of colors and a sweet, crisp texture throughout the salad. The sweetness of the red and yellow peppers is perfect for balancing the savory elements.
- Finely Dice the Red Onion:
Peel your small red onion. The key here is to dice it very finely. A sharp, pungent raw red onion can sometimes be overwhelming, but a finely diced one distributes its flavor evenly and provides a lovely subtle bite without dominating. Slice the onion in half lengthwise, then make several horizontal cuts (without cutting all the way through the root end), followed by vertical cuts, and finally slice across to create tiny dice. If you find raw red onion too strong, you can soak the diced onion in a bowl of ice water for about 10 minutes, then drain and pat dry. This significantly mellows its flavor. I often do this if I’m preparing the salad for guests who might be sensitive to raw onion’s pungency.
- Chop the Fresh Herbs:
Wash your fresh parsley and mint leaves thoroughly and pat them dry. Remove any thick stems from the parsley. Roughly gather the leaves together, then finely chop them. For the mint, simply pluck the leaves from the stems and finely chop them. You want a good amount of these fresh herbs, as they add incredible brightness and aromatics to the salad. Remember, the mint is a game-changer!
Crafting the Zesty Dressing
The dressing is the glue that brings all the beautiful ingredients of our “Colorful Halloumi Pasta Salad” together. This homemade lemon-herb vinaigrette is incredibly fresh, vibrant, and perfectly complements the rich halloumi and crisp vegetables. Making it from scratch allows you to adjust the flavors to your exact preference.
- Combine the Wet Ingredients:
In a medium-sized bowl, pour in your 1/2 cup of high-quality extra virgin olive oil. This forms the base of our vinaigrette. Next, add the freshly squeezed lemon juice (about 1/4 cup from 2-3 lemons) and the 2 tablespoons of red wine vinegar. The combination of lemon and red wine vinegar provides a wonderfully complex acidity that is bright and tangy.
- Incorporate the Flavor Boosters:
To the wet ingredients, add the 1 tablespoon of Dijon mustard. As I mentioned before, Dijon is magical; it not only adds a lovely subtle tang but also helps to emulsify the dressing, meaning it will prevent the oil and vinegar from separating too quickly. Stir in your 2 minced garlic cloves. Fresh garlic is key here, providing a pungent, aromatic warmth. If you prefer a milder garlic flavor, you can use a garlic press or mince it even finer. For a touch of balance and to round out the sharp acidity, whisk in the optional 1 teaspoon of honey or maple syrup. I find that this small addition truly makes the dressing sing, creating a harmonious blend of sweet, sour, and savory.
- Season and Whisk Vigorously:
Add a good pinch of kosher salt (start with about 1/2 teaspoon) and several grinds of freshly ground black pepper to the bowl. Now, grab a whisk and get ready to work! Whisk all the ingredients together vigorously for at least 1-2 minutes until the dressing is well combined and slightly thickened. You’ll notice the oil and vinegar emulsifying, creating a homogenous, slightly creamy consistency. This vigorous whisking is important to ensure all the flavors are fully incorporated and distributed evenly.
- Taste and Adjust:
This is arguably the most important step in making any dressing! Dip a small spoon into the dressing and taste it. What does it need? Does it require more salt to bring out the flavors? A bit more lemon juice or vinegar for an extra tang? Perhaps another touch of honey to sweeten it slightly? Adjust the seasonings to your personal preference. Remember, the dressing will be coating a large quantity of pasta and vegetables, so it should taste quite robust on its own. Don’t be afraid to add a little more salt than you think; it really helps to elevate all the other flavors.
Assembling Your Colorful Halloumi Pasta Salad
This is the moment of truth! Bringing all our perfectly prepped components together to create a harmonious and incredibly delicious “Colorful Halloumi Pasta Salad.” The key here is gentle mixing to ensure everything is evenly coated without mushing the ingredients.
- Combine Pasta and Vegetables:
In your absolute largest mixing bowl – you want plenty of room to toss without making a mess – place the cooled al dente pasta. Add all of your beautifully chopped vegetables: the halved cherry tomatoes, diced cucumber, diced red bell pepper, diced yellow bell pepper, and the finely diced red onion. I always marvel at how vibrant and appealing these colors look together even before the dressing goes in!
- Add the Herbs and Halloumi:
Sprinkle the finely chopped fresh parsley and mint over the pasta and vegetables. These herbs are critical for the fresh, aromatic quality of the salad. Finally, gently add the cooled, pan-fried halloumi cubes or slices. Be gentle with the halloumi, as it can sometimes break apart if handled too roughly, especially if you’ve cut it into smaller pieces.
- Dress the Salad Generously:
Pour your freshly made, perfectly seasoned zesty dressing evenly over all the ingredients in the bowl. Don’t be shy; this dressing is designed to coat everything beautifully and imbue it with flavor.
- Toss Gently but Thoroughly:
Using two large spoons or a pair of salad tongs, gently toss the salad. You want to mix everything until all the pasta, vegetables, halloumi, and herbs are evenly coated with the dressing. Take your time with this step, ensuring that the dressing reaches every nook and cranny of the pasta and vegetables. You’ll notice the colors starting to meld together, and the aroma will be absolutely intoxicating.
- Allow Flavors to Meld (The Crucial Resting Period):
This step is often overlooked but is absolutely essential for the best possible “Colorful Halloumi Pasta Salad.” Once tossed, cover the bowl with plastic wrap or a tight-fitting lid and refrigerate for at least 30 minutes, but ideally 1 to 2 hours. This resting period allows all the incredible flavors to meld and deepen. The pasta will absorb some of the dressing, becoming even more flavorful, and the vegetables will slightly soften, integrating more harmoniously into the dish. If you’re making this for a gathering, preparing it a few hours in advance is highly recommended.
- Final Taste Test and Serve:
Before serving, give the salad one last stir. Taste a spoonful. Does it need a final sprinkle of salt or pepper? Sometimes, after chilling, the flavors can mellow slightly, and a touch more seasoning can really wake them up. You might even want to add an extra squeeze of fresh lemon juice if you desire a brighter finish. Serve your vibrant “Colorful Halloumi Pasta Salad” chilled or at cool room temperature. It’s a fantastic main course for a light meal, a perfect side dish for a barbecue, or a brilliant addition to any potluck or picnic. Enjoy the delightful medley of textures and flavors!
Any leftover salad can be stored in an airtight container in the refrigerator for up to 3-4 days. The flavors often get even better the next day, though the vegetables might lose a tiny bit of their crispness. If the pasta seems to have absorbed too much dressing, you can always whisk up a small additional amount of the dressing and toss it in just before serving.
Conclusion:
Oh, my goodness, if there’s one recipe I urge you to bookmark, print out, and make this week, it’s this one. I truly believe this isn’t just another item to scroll past; it’s a culinary experience waiting to unfold in your kitchen. From the moment you first assemble the ingredients to that glorious initial bite, I promise you a symphony of flavors and textures that will dance on your palate. What makes this recipe an absolute must-try, you ask? Well, for starters, it’s the sheer delight of the pan-fried halloumi – salty, squeaky, and with that irresistible golden crust, it transforms a simple pasta salad into something truly extraordinary. It’s a cheese lover’s dream, offering a unique bite that sets it apart from any other cheese you might typically find in a cold salad.
Then there’s the incredible vibrancy of the fresh vegetables. I adore how their crispness and natural sweetness contrast beautifully with the rich halloumi and tender pasta. We’re talking about a dish that doesn’t just taste good; it looks utterly magnificent on any table. The array of colors, from the bright cherry tomatoes and verdant herbs to the sunny yellow bell peppers, makes it a feast for the eyes before it even touches your lips. It’s light yet satisfying, refreshing yet deeply flavorful, and surprisingly simple to prepare despite its gourmet appeal. This isn’t just a side dish; it often steals the show as a light main, perfect for those warmer evenings or when you’re craving something wholesome and delicious without spending hours over a hot stove. It perfectly encapsulates everything I love about fresh, accessible, and utterly delicious cooking. It’s the kind of dish that makes you feel good from the inside out.
But the beauty of this dish doesn’t stop at its initial perfection; it also offers incredible versatility. While I’ve given you my favorite rendition, I absolutely encourage you to make it your own! For serving suggestions, this is truly a dish that shines whether served warm, immediately after cooking the pasta and halloumi, or chilled, allowing the flavors to meld beautifully. I often enjoy it straight from the fridge as a quick lunch, but it also makes a stunning centerpiece for a summer potluck or a vibrant side dish at your next barbecue. Imagine it alongside some perfectly grilled chicken, flaky salmon, or even a simple veggie burger for a complete and satisfying meal.
Now, let’s talk variations! If you want to amp up the protein even further, grilled chicken breast, succulent shrimp, or even some cannellini beans would be excellent additions. For an extra layer of flavor and texture, consider tossing in some Kalamata olives for a briny kick, or a handful of sun-dried tomatoes for a concentrated burst of sweetness. Fresh herbs are your friend here – feel free to experiment with a mix of fresh parsley, basil, and perhaps even a touch of fresh mint for an unexpected zing. If you’re looking to play with the dressing, while my recipe provides a wonderfully balanced one, a light lemon-tahini dressing or a homemade pesto could also elevate this dish in delightful new ways. And for those with dietary considerations, this recipe adapts beautifully to gluten-free pasta, ensuring everyone can enjoy its deliciousness. The core of what makes this so special – the grilled halloumi and fresh veggies – remains constant, allowing for endless customization.
So, there you have it – my heartfelt plea for you to try this incredibly delicious and visually stunning Colorful Halloumi Pasta Salad. It truly is a recipe that brings joy to the kitchen and delight to the dining table. I’m absolutely convinced that once you make it, you’ll find yourself adding it to your regular rotation. Don’t let another day pass without experiencing the wonderful flavors and textures that await you in this simple yet sophisticated dish. Please, make it, savor it, and then come back and tell me all about it! I am genuinely excited to hear how it turned out for you, what delightful variations you came up with, and how your family and friends reacted. Your feedback, your photos, and your unique twists inspire me endlessly, and I can’t wait to see your culinary creations. Happy cooking, and happy eating!
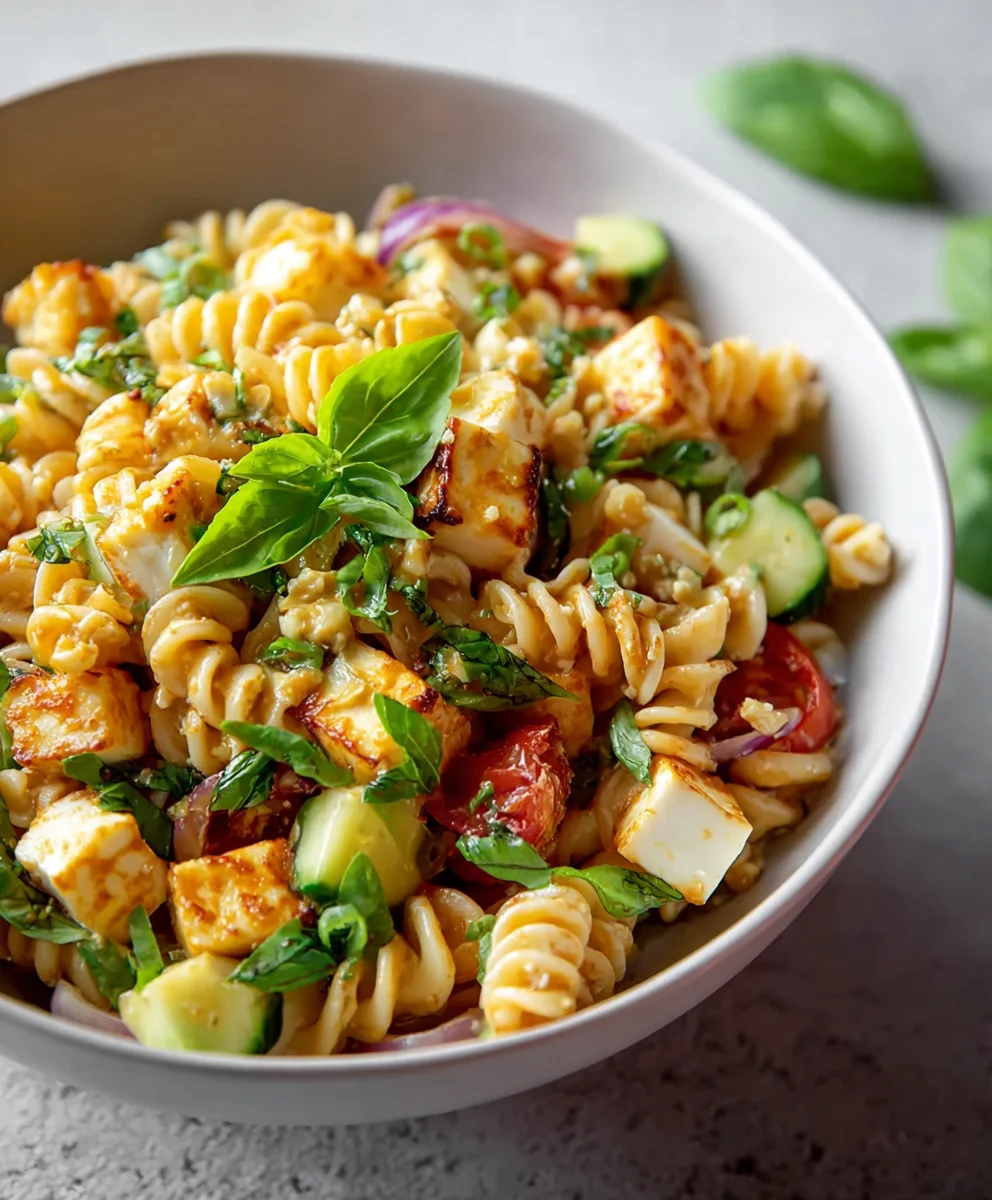
Colorful Halloumi Pasta Salad
A vibrant Halloumi Pasta Salad bursting with fresh vegetables, perfectly al dente pasta, and golden pan-fried halloumi cheese. A refreshing, satisfying, and easy-to-make dish perfect for summer lunches, dinners, picnics, or potlucks.
Ingredients
-
300g pasta, short shape (e.g., fusilli, farfalle)
-
200g halloumi, cubed
-
300g broccoli, cut into small florets
-
300g cherry tomatoes, halved
-
1 large English cucumber, diced
-
2 bell peppers (e.g., red, yellow), diced
-
1 small red onion, finely diced
-
1/2 cup fresh parsley, chopped
-
1/4 cup fresh mint, chopped
-
1/2 cup extra virgin olive oil (for dressing)
-
2 tbsp extra virgin olive oil (for frying halloumi)
-
1/4 cup fresh lemon juice
-
2 tbsp red wine vinegar
-
1 tbsp Dijon mustard
-
1 tsp honey or maple syrup (optional)
-
2 cloves garlic, minced
-
Kosher salt to taste
-
Freshly ground black pepper to taste
Instructions
-
Step 1
Cook 300g pasta al dente in generously salted water. Drain, lightly toss with 1 tsp olive oil to prevent sticking, and spread to cool completely. -
Step 2
Steam or blanch 300g broccoli florets until tender-crisp. Immediately transfer to an ice bath to stop cooking and retain color; drain very well. -
Step 3
Pat 200g halloumi blocks very dry, then slice 1/4-inch thick. Heat 2 tbsp olive oil in a large non-stick skillet over medium-high heat. Fry halloumi for 2-3 minutes per side until gloriously golden brown. Drain on paper towels, then cube once cool enough to handle. -
Step 4
Halve 300g cherry tomatoes. Dice 1 large English cucumber, 2 bell peppers, and 1 small red onion. Finely chop 1/2 cup fresh parsley and 1/4 cup fresh mint. -
Step 5
Prepare the zesty dressing: In a medium bowl, vigorously whisk together 1/2 cup extra virgin olive oil, 1/4 cup fresh lemon juice, 2 tbsp red wine vinegar, 1 tbsp Dijon mustard, 1 tsp honey or maple syrup (optional), 2 minced garlic cloves, and a generous pinch of kosher salt and freshly ground black pepper until emulsified. Taste and adjust seasonings as needed. -
Step 6
In your largest mixing bowl, combine the cooled pasta, cooked broccoli, halved cherry tomatoes, diced cucumber, diced bell peppers, finely diced red onion, chopped parsley, chopped mint, and the cubed pan-fried halloumi. -
Step 7
Pour the freshly made dressing evenly over all the ingredients. Using two large spoons or tongs, gently toss the salad until everything is thoroughly and evenly coated. Cover the bowl and refrigerate for at least 1 to 2 hours to allow the flavors to meld and deepen. -
Step 8
Before serving, give the salad one last stir. Taste and adjust seasoning with additional salt, pepper, or lemon juice if desired. Serve chilled or at cool room temperature. Leftovers can be stored in an airtight container in the refrigerator for up to 3-4 days.
Important Information
Nutrition Facts (Per Serving)
It is important to consider this information as approximate and not to use it as definitive health advice.
Allergy Information
Please check ingredients for potential allergens and consult a health professional if in doubt.